









Top 7 Tips to Detect Oil Leaks Efficiently


To detect oil leaks efficiently, regularly inspect for brown stains under your vehicle and check gasket seams for grease. Monitor your oil level with the dipstick and watch for dashboard warnings. Clean and degrease your engine before inspection, then use targeted lighting and mirrors to spot leaks. Apply UV dye mixed with oil for precise leak tracing. Finally, know when to call a professional if leaks persist or are hard to find. Let’s explore how to spot these issues accurately and protect your engine.
Table
- Main Points
- Understanding Oil Leak Indicators
- Inspecting Fluid Levels Regularly
- Preparing and Cleaning the Engine for Inspection
- Using Visual Aids to Locate Leaks
- Identifying Common Leak Points on Your Vehicle
- Employing UV Dye for Accurate Leak Detection
- Knowing When to Seek Professional Assistance
- Frequently Asked Questions
- Final Thoughts
Main Points
- Regularly inspect underneath the vehicle for brown or amber oil stains indicating leaks.
- Check engine oil levels frequently using the dipstick to spot sudden drops.
- Clean and degrease the engine thoroughly before inspection for clearer leak detection.
- Use UV dye mixed with engine oil and a UV light to locate hidden leaks precisely.
- Monitor the dashboard oil warning light and engine noise for signs of serious leaks.
Understanding Oil Leak Indicators

How can you quickly recognize an oil leak in your vehicle? Start by checking for brown or amber oil stains beneath your car—these spots are common leak indicators. Next, inspect the engine area closely, focusing on gasket seams and seals where grease buildup or discoloration signals possible leaks. Don’t forget to check your oil level regularly using the dipstick; a sudden low oil reading after a recent top-up often points to an active leak. Pay attention to the dashboard oil light, which warns you of low oil or fluid levels. For a more precise diagnosis, consider using UV dye mixed with engine oil; it fluoresces under UV light, helping you locate elusive leaks. Staying vigilant lets you tackle oil leaks early, maintaining your vehicle’s freedom from damage.
Inspecting Fluid Levels Regularly

Although inspecting fluid levels may seem routine, doing so regularly is essential for early leak detection and maintaining your vehicle's best performance. You should check engine oil, coolant, brake fluid, and power steering fluid at least once a month. Use the dipstick, marked with a red or orange tab, to monitor oil levels precisely. If the engine oil level drops shortly after an oil change or top-up, it’s a clear sign of potential leaks. Pay close attention to fluid color and texture—fresh engine oil is amber and slippery, while old oil appears dark brown or black. Consistent monitoring of fluid levels helps you detect leaks early, preventing serious engine damage and costly repairs, ensuring your vehicle runs efficiently and reliably. When checking fluid levels, it's also helpful to inspect critical components such as the area around the oil pan, gaskets, and undercarriage for any visible signs of leakage, as this can further aid in early detection and maintenance.
Preparing and Cleaning the Engine for Inspection

Before you start inspecting for oil leaks, make certain to degrease the engine thoroughly using a suitable cleaner while protecting electrical components. After cleaning, allow the engine to dry completely to guarantee any new oil seepage is clearly visible. Use targeted lighting and mirrors to examine hard-to-reach areas around seals and gaskets for signs of fresh leaks. For efficient oil collection during inspections, consider the benefits of using a 20 gallon oil drain pan with pump to manage and dispose of fluids safely.
Engine Degreasing Techniques
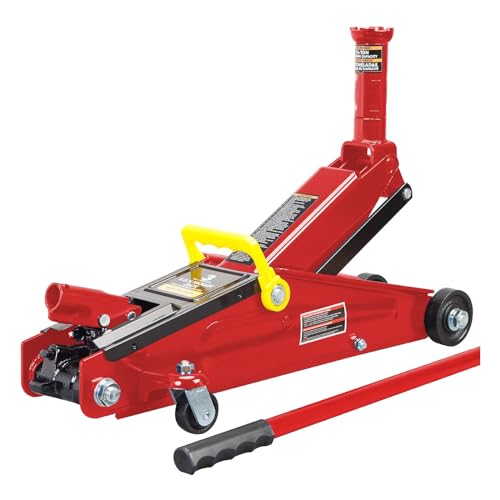
Three essential steps assure effective engine degreasing before inspection. First, confirm the engine is off and cool to avoid injury. Next, apply a commercial engine degreaser generously to areas around the oil filter, seals and gaskets, and other oily parts. Let it sit 5-10 minutes to break down stubborn grease and clean engine oil residues. Finally, rinse carefully with a gentle water stream, avoiding electrical components. Dry thoroughly before you inspect for fresh oil leaks, which stand out clearly on a clean surface. Using built-in safety features on your floor jack while working further reduces risks during degreasing and inspection.
| Step | Action | Purpose |
|---|---|---|
| 1 | Cool engine off | Safety |
| 2 | Apply commercial engine degreaser | Remove oil buildup |
| 3 | Rinse gently | Avoid damage |
| 4 | Dry completely | Highlight fresh oil leaks |
Drying and Inspection
To guarantee accurate detection of oil leaks, you must let the engine dry completely after degreasing. Moisture can obscure oil leaks, hindering your inspection. After cleaning with a degreaser, avoid wetting electrical components and allow ample drying time. Begin your inspection with the engine off, using a flashlight and mirrors to illuminate hard-to-see areas. This guarantees you don’t miss subtle oil leaks. Once dry, turn the engine on to check for active leaks, such as spraying oil from worn seals. For enhanced precision, apply powder to suspected leak zones; oil will trace the powder trail back to the leak source. This methodical drying and inspection process enables you to identify leaks efficiently and liberate your engine from hidden issues.
 Why Use Specialized Tools for Fluid Leak Detection?
Using Visual Aids to Locate Leaks

When you need to pinpoint oil leaks, using visual aids can greatly enhance your inspection accuracy. To spot oil efficiently, place a white plate or newspaper under your vehicle overnight to catch drips. Use mirrors and flashlights to find an oil leak in hard-to-see spots. Applying fine powder highlights oil trails after driving, while UV dye makes leaks glow under a blacklight. These techniques help you keep an eye on critical areas like oil pan gaskets and crankshaft seals.
| Visual Aid | Purpose |
|---|---|
| White plate | Catch drips for easy spotting |
| Newspaper | Identify fluid color |
| Mirror + flashlight | Inspect hidden areas |
| Fine powder | Reveal oil trails |
| UV dye | Pinpoint exact leak location |
Identifying Common Leak Points on Your Vehicle

Where do most oil leaks originate on your vehicle? You should inspect these essential points to liberate your engine from unseen damage:
Discover the common origins of oil leaks to protect your engine from hidden damage early on
- Valve cover and oil pan gasket: These gaskets degrade with time, causing oil seepage. Check for oil accumulation around the valve cover, especially if bolts seem loose or unevenly tightened.
- Crankshaft seals: Both front and rear seals are prone to wear, with the front seal often leaking near the crankshaft pulley. Oil pooling here signals seal failure.
- Oil filter and oil cooler: Examine the oil filter’s mounting area and the oil cooler lines for leaks, as these components are crucial for system integrity and temperature control.
Regularly inspect these areas to detect leaks early and maintain your vehicle’s freedom from oil loss and damage. If you suspect a leak is affecting your battery or electrical system, using a car battery tester can help confirm whether related components are performing properly.
Employing UV Dye for Accurate Leak Detection
One of the most reliable methods for pinpointing oil leaks is employing UV dye mixed directly into your engine oil. Add the dye during oil changes or maintenance, then run the engine for 10-15 minutes to let it circulate. Using a UV flashlight, you can detect leaks as the dye fluoresces bright green or yellow, revealing even the smallest escapes. This technique enhances visual inspection, especially in hard-to-reach areas where traditional checks fail. By integrating UV dye in your routine maintenance, you enable early detection of leaks, preventing costly damage. This practical, precise approach empowers you to monitor your engine’s health effectively, ensuring timely intervention and safeguarding your vehicle’s performance and longevity.
Knowing When to Seek Professional Assistance
If you notice persistent oil spots or your oil pressure warning light activates, it's time to consult a professional technician. Experts use specialized tools, like UV dye, to detect complex leaks that are often missed during routine inspections. Seeking their assistance guarantees accurate diagnosis and prevents further engine damage.
Signs of Complex Leaks
When you notice a rapid drop in oil levels or persistent, unusual stains despite regular maintenance, these signs point to complex leaks that demand professional assessment. You should immediately inspect these symptoms closely:
 Power Steering Fluid Leak Repair Cost Guide
- Multiple oil spray or pooling sites indicate several leak sources that require a mechanic’s expertise to diagnose and repair effectively.
- Persistent engine noise or overheating alongside oil leaks signals potential severe engine damage needing urgent professional intervention.
- Difficulty locating the leak source after thorough checks suggests internal issues beyond standard repairs, making expert evaluation necessary.
Recognizing these signs helps you avoid worsening damage and guarantees your engine’s integrity. Don’t hesitate to consult a qualified mechanic when leaks challenge your inspection skills or when oil levels fall unexpectedly fast.
Benefits of Expert Inspection
Professional inspections play an essential role in accurately diagnosing complex oil leaks that often elude casual observation. When you seek professional assistance, expert inspection reveals issues like head gasket or crankshaft seal leaks, which require specialized tools and knowledge. During a full oil change service, technicians perform a 19-point check that helps prevent oil leaks by identifying early signs often missed by owners. Regular inspections detect age-related wear in seals and gaskets, especially in vehicles over six years old, reducing the risk of severe engine damage. Additionally, mechanics tailor your maintenance schedule and recommend ideal oil types to keep your engine running smoothly. Relying on expert inspection empowers you to maintain performance and avoid costly repairs effectively and efficiently.
Frequently Asked Questions
What Is the Easiest Way to Find an Oil Leak?
You’ll master oil leak detection by combining visual inspections of common oil sources with dye testing and pressure testing. Focus on oil stain identification and thorough engine component inspection to accurately locate leaks and fix them efficiently.
How to Check for Engine Oil Leakage?
Check engine components for oil stains and leakage symptoms using inspection tools like dipsticks and UV dye. Follow maintenance tips, identify repair methods early, and seek professional help to guarantee your engine stays leak-free and efficient.
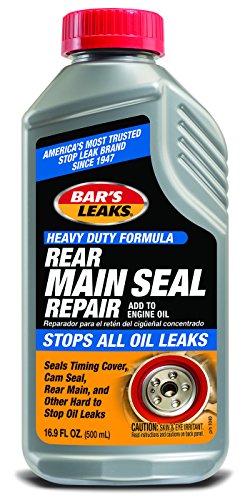
Do Oil Leak Sealers Work?
You’ll find oil sealers’ effectiveness varies by type and application technique; they often serve as temporary solutions. User reviews highlight mixed results, so weigh cost comparison carefully and pursue long term fixes for true liberation from leaks.
What Is the Most Common Spot for an Oil Leak?
When subtle whispers of gasket failure emerge, you’ll find valve cover gaskets most often challenge seal integrity. Spotting oil stains there signals engine component wear, urging you toward vehicle maintenance and preventive measures to control leak symptoms.
Final Thoughts
Detecting oil leaks is like tracing a hidden stream beneath your vehicle’s surface—each drip signals a potential issue. By regularly inspecting fluid levels, cleaning your engine, and using tools like UV dye, you illuminate these silent warnings before they grow. Remember, knowing common leak points sharpens your focus, but when the path becomes unclear, don’t hesitate to call a professional. Stay vigilant, and keep your engine running smoothly like a well-oiled machine.
 How to Locate a Coolant Leak Step-by-Step
Reliable Floor Jacks on a Budget: Best Picks for Under $150
Top-Rated Floor Jacks Over $100: Built for Professionals, Priced for Smart Buyers
If you want to know other articles similar to Top 7 Tips to Detect Oil Leaks Efficiently you can visit the Fluid Leak Solutions category.
How to Identify Car Fluid Leaks Overnight

Why Fluid Leaks Threaten Vehicle Safety

How to Identify Fuel Leak Sources in Vehicles

How to Spot Brake Fluid Leak Symptoms

How to Locate a Coolant Leak Step-by-Step

Power Steering Fluid Leak Repair Cost Guide

Why Use Specialized Tools for Fluid Leak Detection?

Step-by-Step Fluid Leak Inspection for Cars
Leave a Reply
This is also interesting