











7 Best Tips for DIY Brake System Cleaning


To DIY clean your brake system effectively, start by preparing a clean, well-lit workspace and gather safety gear, brake cleaner, and brushes.
Inspect brake pads and rotors for wear before cleaning. Use a non-chlorinated brake cleaner spray for precise application, scrubbing stubborn grime carefully.
Lubricate caliper pins and contact points with high-temperature grease to prevent noise and uneven wear.
After cleaning, test brakes at low speed for proper function. Following these steps guarantees safety and performance; explore further for detailed techniques.
Table
- Main Points
- Prepare a Safe and Organized Workspace
- Gather Essential Tools and Protective Gear
- Inspect Brake Components Before Cleaning
- Choose the Right Brake Cleaner and Cleaning Method
- Clean Brake Pads and Rotors Without Removing Tires
- Lubricate Brake Components to Prevent Noise and Wear
- Perform a Post-Cleaning Brake Function Test
- Frequently Asked Questions
- Final Thoughts
Main Points
- Park on a level surface, engage the parking brake, and wear protective gloves and safety glasses before starting brake cleaning.
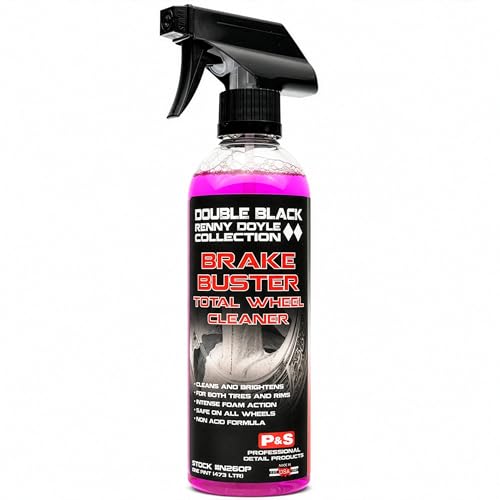
- Use a non-chlorinated brake cleaner spray with a nozzle for precise application and quick drying of brake components.
- Inspect brake pads and rotors for wear or damage, replacing pads thinner than a quarter inch and checking rotors for cracks.
- Clean brake parts by spraying cleaner through wheel gaps and scrubbing stubborn grime with a small brush, then let components dry fully.
- Lubricate caliper slide pins and pad backs with high-temperature brake grease to prevent noise and ensure smooth operation.
Prepare a Safe and Organized Workspace

Before you begin cleaning your brake system, make certain to park your vehicle on a level surface and engage the parking brake to prevent any movement. You must ascertain your workspace is clean, well-lit, and organized to maintain safety and efficiency. Clear the area of clutter to avoid hazards and enhance visibility of brake components. Consult your vehicle’s manual for specific instructions and safety precautions, tailoring your approach accordingly. Have all necessary tools and materials at hand, minimizing interruptions during the process. While you won’t be donning protective gear just yet, keep it accessible for the next phase. By preparing a safe and organized workspace, you lay the foundation for effective brake system maintenance, empowering you to work confidently and liberate yourself from costly professional services.
Gather Essential Tools and Protective Gear

With your workspace secured and organized, focus on assembling the necessary tools and protective gear to proceed efficiently. To liberate yourself from dependency on a professional mechanic, gather essential tools tailored for cleaning the brakes on your vehicle’s brake system. Prioritize safety by donning protective gear to shield against hazardous chemicals and debris.
Secure your workspace and gather essential tools and protective gear to clean your vehicle’s brakes safely and effectively.
Why Regular Brake Fluid Changes Matter Most
- Brake cleaner spray – effectively removes contaminants without damaging components.
- Small brush – reaches tight spaces for thorough cleaning.
- Safety glasses – protect your eyes from splashes and particles.
- Gloves – safeguard your skin from irritants and grime.
Having these specific items guarantees you maintain precision and safety, empowering you to execute brake system cleaning confidently and competently.
Inspect Brake Components Before Cleaning

Start by thoroughly inspecting each brake component to identify any wear or damage that could compromise safety. Inspect your brake pads for pad thickness; replace them if they measure less than a quarter of an inch to maintain peak brake system performance. Examine rotors and other brake parts for scoring, cracks, or uneven wear. Listen closely for unusual noises like squeaking or grinding, which often indicate worn components needing immediate attention. Check brake fluid levels in the reservoir, as low levels might signal a leak affecting braking efficiency. Establish a routine inspection every six months to catch issues early. If you encounter severe damage or are unsure about any findings, consult a professional before you clean your brake system to guarantee safety and effective maintenance. Consider using a brake bleeder kit for efficient brake fluid replacement and to further ensure your brake system is functioning optimally.
Choose the Right Brake Cleaner and Cleaning Method

Choose a brake cleaner specifically designed for brake systems to guarantee effective removal of grease and debris without residue. Use a non-chlorinated formula to reduce health and environmental risks. Combine the cleaner with a small brush and follow manufacturer instructions to clean components thoroughly without removing them. For even more efficient maintenance, consider using a brake bleeder kit to help remove air and contaminants from your brake lines, ensuring optimal system performance.
Selecting Effective Brake Cleaners
Although selecting the right brake cleaner might seem straightforward, using a product specifically formulated for automotive use guarantees you won't leave any residue that could compromise braking performance. To liberate your brake system from contaminants efficiently, focus on these essentials:
- Choose a non-chlorinated brake cleaner to protect brake components and reduce environmental impact.
- Prioritize a high evaporation rate to promote quick drying and prevent moisture interference.
- Use a spray nozzle for precise application, targeting rotors and calipers without overspray.
- Always adhere to the manufacturer's instructions for dwell time and cleaning procedures to achieve the best results.
Cleaning Techniques Without Removal
When you clean brake components without removing them, selecting the right brake cleaner and method becomes critical to avoid damage and guarantee thorough grime removal. Choose a brake cleaner designed for brake systems that leaves no residue. Apply it through wheel gaps, focusing on rotors and calipers, and avoid sensitive parts. Use a small brush to loosen dirt on brake pads and other accessible areas. Rinse with low-pressure water if needed, and let components dry fully to maintain peak braking performance and prevent wear. For enhanced efficiency and minimal mess, consider tools such as the BILITOOLS Vacuum Brake Bleeder to streamline your brake maintenance process.
| Cleaning Step | Purpose |
|---|---|
| Choose quality cleaner | Avoid residue, protect parts |
| Apply via wheel gaps | Target rotors and calipers |
| Brush gently | Remove stubborn grime |
| Rinse if necessary | Eliminate debris |
| Dry completely | Prevent moisture damage |
Clean Brake Pads and Rotors Without Removing Tires

You can effectively clean brake pads and rotors without removing the tires by applying brake cleaner spray through the wheel gaps. Use a small brush to gently scrub away stubborn grime, taking care not to damage any components. Finish by rinsing with a low-pressure hose and allowing the parts to dry completely before driving. For optimal results, consider using a manual brake bleeder kit to ensure the brake system is thoroughly maintained and free of contaminants.
Cleaning Through Wheel Gaps
A straightforward way to clean brake pads and rotors without removing the tires involves accessing them through the wheel gaps. This method lets you maintain your brake systems efficiently while liberating yourself from time-consuming disassembly. Here’s how to clean the brakes effectively:
- Park on a flat surface and engage the parking brake for safety before checking brake components.
- Spray a quality brake cleaner onto the brake pads and rotors through the wheel gaps, targeting brake dust buildup.
- Use a small brush to loosen grime gently, then rinse lightly with low-pressure water if needed.
- Employ compressed air to dry the parts completely, ensuring peak brake performance before driving.
This precise approach keeps your brake system clean and reliable without removing tires.
 What Does Professional Brake Maintenance Cost?
Tools and Techniques
Three essential tools simplify cleaning brake pads and rotors without removing tires: a quality brake cleaner spray, a small brush, and safety gear. Use brake cleaner to dissolve grime through the wheel gaps efficiently. A brush helps dislodge stubborn dirt on brake rotors and pads, enhancing the cleaning process. Always wear safety glasses and gloves to protect yourself from chemicals and debris. For a complete clean, rinse with low-pressure water and make sure components dry fully to maintain peak braking performance. When working in tight spaces like behind wheels, it’s crucial to maintain a clean area to avoid accidents and ensure an efficient workflow.
| Tool | Purpose |
|---|---|
| Brake Cleaner | Removes brake dust and grime |
| Small Brush | Scrubs brake pads and rotors gently |
| Safety Glasses | Protects eyes from chemical splashes |
| Gloves | Shields skin during cleaning process |
| Hose (Low-Pressure) | Rinses residual cleaner and debris |
Regular cleaning preserves your braking system’s effectiveness and your driving freedom.
Lubricate Brake Components to Prevent Noise and Wear
Although brake components endure constant friction and heat, regular lubrication can greatly reduce noise and wear. To maintain peak performance in your braking system, follow these steps:
- Apply high-temperature brake grease to caliper slide pins to guarantee smooth movement and prevent binding that causes uneven wear.
- Use brake lubricant on the back of brake pads to minimize noise and vibration, enhancing your driving experience.
- Lubricate caliper contact points sparingly; excessive lubricant attracts dirt, leading to premature wear and reduced efficiency.
- Always consult the manufacturer’s specifications for the correct brake lubricant type and application method to confirm compatibility.
Perform a Post-Cleaning Brake Function Test
Someone must verify that your brake system functions correctly after cleaning to confirm safety and performance. Begin by pumping the brake pedal several times to restore proper pressure. Next, conduct a low-speed test drive at 10-15 mph on a level surface to evaluate braking effectiveness and detect any unusual sounds or vibrations. Focus on the brake feel during the test: a firm pedal confirms correct function, while a spongy sensation may indicate air in the lines that requires bleeding. Assess brake performance under various conditions, including gentle stops and sudden braking, to confirm consistent response. This thorough post-cleaning brake function test frees you to trust your brake system’s reliability, enhancing your safety and control every time you drive.
Frequently Asked Questions
What Is the Best Homemade Brake Cleaner?
You’ll find homemade cleaner recipes combining vinegar brake cleaner and baking soda scrub effective, leveraging natural cleaning solutions. Incorporate isopropyl alcohol usage for quick drying, citric acid benefits for grime removal, and essential oil additives for eco friendly alternatives.
What Is the Best Way to Flush a Brake System?
You’ll flush brake fluid starting from the furthest brake calipers, ensuring brake lines clear air and debris. Maintain brake pads, rotors, and calipers well to prevent brake noise and optimize brake performance during brake maintenance.
What Is the Best Thing to Clean Brakes With?
Like a surgeon’s scalpel, choose the right brake cleaner types for precise brake dust removal. Combine cleaning tools wisely for brake rotor care and brake pad maintenance. Always inspect your brake system and consider brake fluid types for DIY brake solutions.
What's the Best Way to Clean up Brake Fluid?
You should immediately contain brake fluid leaks using brake fluid tools and absorbent cloths, then neutralize spills. Prioritize brake fluid safety by testing fluid types, avoiding contamination, performing brake fluid maintenance, and ensuring proper brake fluid disposal to protect environment and vehicle.
 7 Best Ways to Maintain Your Car Brakes
Final Thoughts
By preparing your workspace, gathering the right tools, and inspecting each brake component carefully, you set the foundation for effective cleaning. Choosing the proper cleaner, cleaning pads and rotors methodically, and lubricating moving parts guarantees peak performance and longevity. Finally, performing a thorough post-cleaning brake test confirms safety and functionality. Follow these steps consistently, work precisely, and maintain vigilance to keep your brake system reliable and efficient every time you tackle maintenance.
Reliable Floor Jacks on a Budget: Best Picks for Under $150
Top-Rated Floor Jacks Over $100: Built for Professionals, Priced for Smart Buyers
If you want to know other articles similar to 7 Best Tips for DIY Brake System Cleaning you can visit the Brake System Maintenance category.
7 Best Ways to Maintain Your Car Brakes

What Does Professional Brake Maintenance Cost?

Why Regular Brake Fluid Changes Matter Most

How Frequently Should You Inspect Car Brake Pads?

Top Products for Effective Brake System Cleaning

Top 5 Warning Signs Your Brakes Need Service

3 Best Tips for Winter Brake System Care

10 Tips to Keep Your Car Brakes Reliable
Leave a Reply
This is also interesting