











10 Best Solutions for Car AC Not Cooling


If your car AC isn’t cooling well, start by checking and replacing the cabin air filter to guarantee proper airflow.
Inspect AC controls and wiring for faults, then diagnose refrigerant levels with a gauge and recharge if low.
Clean or replace a clogged condenser and test temperature sensors and the blend door actuator for proper function.
Inspect the compressor clutch and look for refrigerant leaks to seal promptly.
You’ll also want to verify cooling fan operation to restore efficiency.
More detailed steps can help you pinpoint and fix issues effectively.
Table
- Main Points
- Check and Replace the Cabin Air Filter
- Inspect and Repair Faulty AC Controls
- Diagnose and Recharge Low Refrigerant Levels
- Clean or Replace a Damaged Condenser
- Test and Replace Faulty Temperature Sensors
- Examine and Fix Pressure Switch Issues
- Repair or Replace the Blend Door Actuator
- Inspect and Service the Compressor Clutch
- Detect and Seal Refrigerant Leaks
- Verify Functionality of Cooling Fans
- Frequently Asked Questions
- Final Thoughts
Main Points
- Replace a clogged cabin air filter regularly to restore proper airflow and improve AC cooling efficiency.
- Check refrigerant levels and recharge if low to ensure the AC blows cold air consistently.
- Inspect and repair refrigerant leaks using UV dye to maintain correct pressure and cooling capacity.
- Test and replace faulty pressure switches and compressor clutches to restore consistent compressor operation.
- Clean or replace the condenser to remove debris and prevent airflow restrictions that reduce cooling performance.
Check and Replace the Cabin Air Filter

One of the simplest yet most effective steps you can take to improve your car's AC cooling is to check and replace the cabin air filter. A clogged filter restricts airflow, drastically reducing cooling effectiveness and AC performance. By regularly inspecting the cabin air filter, you guarantee ideal air quality inside your vehicle and maintain AC efficiency. Most manufacturers recommend replacing it every 12,000 miles or annually. This DIY maintenance task is affordable, costing between $15 and $30, and prevents strain on the AC system that could lead to costly repairs. Don’t overlook this key component—replacing your cabin air filter liberates your AC system to deliver maximum cooling and clean air, empowering you with control over your vehicle’s comfort and efficiency.
Inspect and Repair Faulty AC Controls

Faulty AC controls can stop your air conditioning system from turning on, often due to damaged wiring or malfunctioning electronic signals, especially in newer vehicles. To restore AC operation, start by inspecting the AC controls for signs of malfunctioning wiring or loose connections. Check the electrical system thoroughly, including fuses—blown fuses often disrupt power flow and impede control function. If you identify damaged wiring or faulty components, repair or replace them promptly to prevent further failure. In some cases, replacing the AC controls entirely is necessary to regain full control over temperature and airflow regulation. Regular inspection and maintenance of your AC controls guarantee reliable operation and prevent unexpected breakdowns, giving you freedom from discomfort during your drives.
Diagnose and Recharge Low Refrigerant Levels

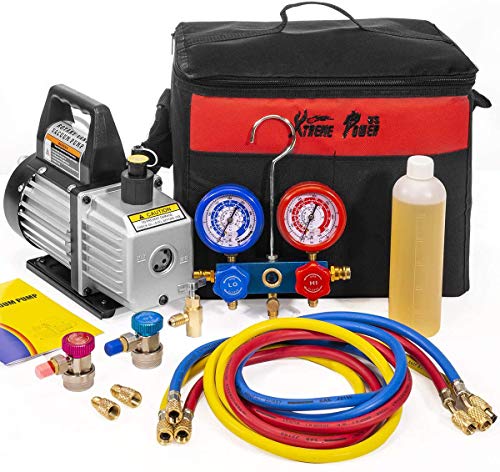
If your car’s AC blows warm air or the compressor cycles frequently, low refrigerant levels might be the cause. To diagnose, connect a manifold gauge set to your AC systems and compare pressures with the vehicle’s specs. Consistently low readings indicate a refrigerant leak. Use a UV dye kit to pinpoint leaks by checking for fluorescent traces around components. Once confirmed, you can recharge your car’s AC using a DIY kit costing $35-50, but be cautious—refrigerants require proper handling due to toxicity and environmental rules. If leaks persist or you prefer certainty, consult a professional mechanic for leak repair and precise recharging. Maintaining correct refrigerant levels guarantees the compressor runs effectively and restores ideal cooling, liberating you from uncomfortable drives.
Clean or Replace a Damaged Condenser

Your car’s condenser, positioned in front of the radiator, plays a critical role in releasing heat from the refrigerant to keep your AC cool. You should clean it regularly by removing debris like leaves and dirt to maintain airflow and efficiency. If you notice corrosion or physical damage, it’s time to replace the condenser, as repairs are rarely effective for severe issues.
Condenser Location and Role
The condenser, positioned at the front of your vehicle just ahead of the radiator, plays a critical role in the AC system by releasing heat absorbed from the refrigerant. Its location guarantees maximum airflow, which is essential for effective cooling. If the condenser becomes damaged or clogged, it restricts airflow, reducing cooling efficiency and putting extra strain on the compressor. To maintain peak performance, you must prioritize regular maintenance, checking for debris or blockages that hinder airflow. A compromised condenser not only lowers cooling capacity but risks compressor failure, escalating repair costs. When damage or corrosion is severe, replacement is necessary to restore the system’s function. Understanding the condenser’s role empowers you to keep your AC system operating at its best, assuring liberation from uncomfortable heat.
Cleaning Methods and Tips
Because debris like leaves and dirt can severely restrict airflow, you should regularly inspect and clean the condenser to maintain ideal cooling performance. Proper cleaning directly preserves cooling efficiency and helps maintain peak AC function. When working on the condenser, follow these key tips:
- Use a soft brush or compressed air to gently remove debris without bending the condenser fins.
- Clean at least twice yearly, especially in warmer climates where debris accumulation accelerates.
- Wash the condenser with a mild detergent and water solution, rinsing thoroughly to avoid residue that impairs heat exchange.
If your condenser is damaged or corroded beyond cleaning, replacing it promptly prevents further inefficiencies and system failures. Regular inspection and cleaning empower you to sustain your vehicle’s AC at peak performance.
 Top 7 Car AC Services in Your Area
Replacement Signs and Timing
Although regular cleaning helps extend its lifespan, a condenser typically shows signs of wear after around 10 years, signaling that you may need to replace it if cooling performance drops noticeably. Key replacement signs for a damaged condenser include warm air blowing, frequent compressor cycling, and pooling refrigerant beneath your vehicle. Neglecting maintenance can exacerbate damage, making necessary replacement critical to restore peak AC performance and avoid system complications.
| Replacement Signs | Indications |
|---|---|
| Warm Air Blowing | Ineffective cooling output |
| Compressor Cycling | Intermittent compressor operation |
| Pooling Refrigerant | Visible fluid leaks under vehicle |
Monitor these signs carefully to guarantee timely action for maintaining the freedom of a comfortably cooled drive.
Test and Replace Faulty Temperature Sensors

When your car’s AC blows warm air, you should test the temperature sensors promptly, as faulty sensors often cause incorrect readings that disrupt system activation. Testing a temperature sensor involves using a multimeter to measure resistance and comparing it with manufacturer specifications. If the sensor fails, replace faulty sensors immediately to restore peak AC performance and guarantee accurate temperature regulation.
Key steps include:
- Inspecting sensors regularly to detect damage early.
- Conducting resistance tests precisely to confirm sensor status.
- Installing new sensors correctly to maintain an efficient AC system.
Maintaining properly functioning temperature sensors assures an efficient AC system, improves fuel economy, and liberates you from discomfort during driving by guaranteeing your car’s climate control works flawlessly.
Examine and Fix Pressure Switch Issues
You’ll want to check the pressure switch since it monitors refrigerant levels and can shut down the compressor if pressures are off. If your AC compressor isn’t engaging or cycles frequently, the pressure switch might be faulty. Use a multimeter to test the switch’s voltage and replace it if it’s not working properly to restore effective cooling.
Role of Pressure Switch
Because pressure switches monitor refrigerant levels closely, they play an essential role in preventing compressor damage by shutting down the AC system when pressures go outside safe ranges. These switches guarantee the compressor engagement only occurs under ideal refrigerant pressure, safeguarding the AC system’s longevity. When pressure switches malfunction, they disrupt proper function, causing erratic cooling or system shutdown.
To maintain your AC system’s efficiency, focus on:
- Inspecting electrical connections for corrosion or looseness.
- Using a multimeter to test switch continuity and voltage.
- Replacing faulty switches according to manufacturer specs.
Signs of Pressure Problems
Pressure switches directly influence your AC system’s ability to maintain proper cooling by monitoring refrigerant pressure and controlling compressor operation. When refrigerant levels drop or system integrity falters, pressure switches detect abnormal pressure readings and may shut down the AC compressor to prevent damage. Signs of pressure problems include frequent cycling of the compressor, inadequate cooling performance, and inconsistent pressure readings. To diagnose these issues, use a manifold gauge set to measure system pressures against manufacturer specifications. Additionally, inspect pressure switches for signs of wear, leaks, or physical damage that can impair their function. Identifying malfunctioning switches early enables you to address root causes before the AC’s cooling efficiency deteriorates greatly, ensuring your system operates safely and effectively.
Repairing or Replacing Switch
Begin by thoroughly inspecting the pressure switch for signs of wear, corrosion, or physical damage that could impair its function. Pressure switches regulate refrigerant pressure, preventing AC system failure by controlling compressor engagement. If you notice intermittent cooling or the compressor not engaging, it’s vital to diagnose the pressure switch promptly. Use a multimeter to check continuity and verify the switch activates at correct pressure levels per your vehicle’s manual. If the switch is faulty, replace the faulty switch immediately to restore efficient cooling performance. Key steps include:
- Assess physical condition and connections for damage or corrosion
- Test electrical continuity and activation thresholds
- Install a compatible replacement switch following manufacturer specifications
Addressing pressure switch issues liberates your AC system, ensuring reliable and efficient cooling.
Repair or Replace the Blend Door Actuator
A malfunctioning blend door actuator can greatly impair your vehicle’s HVAC system by restricting the mix of hot and cold air, often causing only warm air to blow through the AC vents. When you face temperature control issues or inconsistent cabin temperatures, testing actuator function is essential. Inspect the blend door actuator’s movement, ensuring it responds accurately to your AC system settings. If the actuator fails these tests or produces unusual noises, you must repair blend door actuator components or replace faulty actuator units promptly. Doing so restores precise temperature control and frees your HVAC system to deliver effective cooling. Addressing this component directly liberates you from unreliable cabin comfort and inefficient AC operation, making it a critical step in maintaining your car’s overall climate control performance.
Inspect and Service the Compressor Clutch
Start by checking if the compressor clutch engages when you turn the AC to max cool with the engine running. Inspect the electrical connections for corrosion or loose wires that might disrupt power flow. Also, look for signs of wear or damage on the clutch that could affect its operation and cause cooling issues.
Clutch Engagement Check
One essential step to diagnose why your car AC isn't cooling is checking the compressor clutch engagement. Start the engine, set the AC to maximum cooling, and observe the compressor clutch—it should engage and spin if working correctly. If it doesn’t, use a voltmeter to test for voltage at the compressor clutch. No voltage may point to a blown fuse or faulty cycling switch.
 Car AC Service Frequency: 3 Key Tips
Keep these in mind:
- Frequent clutch cycling often signals low refrigerant, impairing cooling efficiency.
- Damage or wear to the compressor clutch can prevent proper engagement, reducing AC system performance.
- If the clutch is faulty, replacing it is necessary to restore full functionality.
This precise clutch engagement check frees you from guesswork and guarantees your AC system operates at peak performance.
Electrical Connection Inspection
Two critical steps in diagnosing compressor clutch issues involve inspecting the electrical connections and measuring voltage. First, examine all electrical connections leading to the compressor clutch; make sure they’re secure and corrosion-free, as loose or damaged connections can stop the clutch from engaging. Next, use a voltmeter to check for voltage at the compressor clutch when the AC is activated. If you detect no voltage, inspect for blown fuses in the circuit—these can interrupt power and require replacement. Should voltage be present but the clutch fails to engage, test the clutch coil resistance with a multimeter. A reading outside the manufacturer’s range signals a faulty clutch needing replacement. Prioritize regular maintenance of electrical connections to prevent failures and maintain peak AC system performance. Further diagnosis may be necessary if these steps don’t resolve the issue.
Signs of Wear
Although the compressor clutch plays an essential role in regulating your car’s AC system, signs of wear can compromise its function and reduce cooling efficiency. You need to inspect the compressor clutch regularly to avoid insufficient cooling caused by a worn or damaged clutch. Key signs of wear include:
- Unusual noises indicating increased friction or clutch failure
- Clutch failing to engage or cycling erratically
- Decreased AC performance despite proper refrigerant levels
If you notice these symptoms, it’s important to replace faulty components promptly. Maintaining the clutch by keeping it clean and lubricated can extend its lifespan and guarantee peak AC system function. Addressing these issues liberates you from ineffective cooling and costly compressor damage, keeping your car’s AC system reliable and efficient.
Detect and Seal Refrigerant Leaks
If your car’s AC is blowing warm air, you might have a refrigerant leak that needs immediate attention. To detect refrigerant leaks, add UV dye to the system and inspect AC components with a UV light. Focus on fittings, hose manifolds, seals, and the compressor, as these areas often develop leaks. Once detected, you'll need precise repairs—either fixing or replacing faulty parts—and recharging the system with the correct refrigerant. Here’s a quick guide to help you identify and address leaks:
| Leak Location | Detection Method |
|---|---|
| Fittings | UV dye & UV light |
| Hose Manifolds | Visual oil residue |
| Seals | Hissing sounds |
| Compressor | Electronic leak detector |
Act promptly to restore your AC’s cooling power and liberate yourself from discomfort.
Verify Functionality of Cooling Fans
A properly functioning cooling fan is critical for maintaining airflow over the condenser and ensuring your car’s AC system dissipates heat effectively. To verify functionality, first check if the cooling fans activate when the AC is on; they typically engage at low speeds initially. Next, inspect for obstructions like leaves or debris that can block airflow or restrict fan movement, causing inefficient cooling. Finally, test the voltage at the fan motor connectors with a multimeter—absence of voltage signals electrical issues or a blown fuse. If the fans do not operate properly despite receiving power, the fan motor may need to be replaced. Remember these steps to liberate your AC system from overheating:
- Check if the cooling fans activate upon AC engagement
- Clear any obstructions hindering fan operation
- Measure voltage at fan motor connectors to diagnose electrical issues
Frequently Asked Questions
How to Fix a Car AC That Won't Cool?
You’ll start with car AC troubleshooting tips: check temperature control settings, replace the cabin air filter, inspect the AC compressor for problems, refill refrigerant if low, and perform seasonal AC maintenance to prevent common AC issues and enable DIY AC fixes.
How Can I Make My Car AC Colder Again?
Like a refreshing change, mastering car maintenance tips and the refrigerant recharge process empowers you to troubleshoot common AC issues, perform DIY AC repairs, and optimize vehicle climate control for efficient cooling methods and summer driving safety.
What Is the Best Solution for a Car With No AC?
You’ll start with ac system troubleshooting, checking common ac problems like refrigerant leaks using refrigerant recharge methods. Follow a condenser inspection checklist, clean the evaporator, replace the cabin air filter, and perform compressor diagnostic steps for effective car maintenance tips.
Why Is My Car AC Not Getting Cold Enough?
Your air conditioning might struggle due to low refrigerant levels, compressor issues, or cabin air blockages. Use diagnostic tools to check temperature control and maintain your climate system regularly with these maintenance tips for ideal cooling.
Final Thoughts
Fixing your car’s AC is like tuning a complex instrument—each part must work in harmony for ideal cooling. By checking filters, controls, refrigerant levels, and key components like the condenser and compressor clutch, you’ll pinpoint and resolve issues efficiently. Don’t overlook sensors, fans, and blend door actuators, as their proper function guarantees consistent airflow and temperature. With these practical steps, you’ll restore your AC’s performance and stay cool on every drive.
 10 Best Eco-Friendly Car AC Service Solutions
Reliable Floor Jacks on a Budget: Best Picks for Under $150
Top-Rated Floor Jacks Over $100: Built for Professionals, Priced for Smart Buyers
If you want to know other articles similar to 10 Best Solutions for Car AC Not Cooling you can visit the Air Conditioning Maintenance category.
Car AC Service Frequency: 3 Key Tips

Top 7 Car AC Services in Your Area

Why Does Car AC Compressor Replacement Cost So Much?

10 Tips to Keep Your Car AC Running Smoothly

Steps to Recharge Your Car AC System Safely

5 Best Affordable Auto AC Repair Services

How to Get Mobile Car Air Conditioning Service

How to Tell Your Car AC Needs Service
Leave a Reply
This is also interesting